Next time you're planted in a chair and are in need of a mental and physical break, pull up this chair yoga routine for a moment of rest and a good stretch. Ideally, a chair with no arms and no wheels works best to allow for a good range of motion and no slipping. These asanas, or poses, will help target the entire body and alleviate chronic pain while improving balance, spatial awareness, cognitive performance and memory.
1. Cat/Cow: Cat: Sitting in your chair facing forward, place hands on knees sitting tall. Take a deep breath in and on the exhale, tip chin to chest as you round your shoulders and back toward the back of the chair relaxing shoulders. Cow: On the inhale, come back to sitting and draw shoulder blades together as you push the chest out and lift up with the heart. This will help to keep the spine long to limit the potential of going into the lower back.
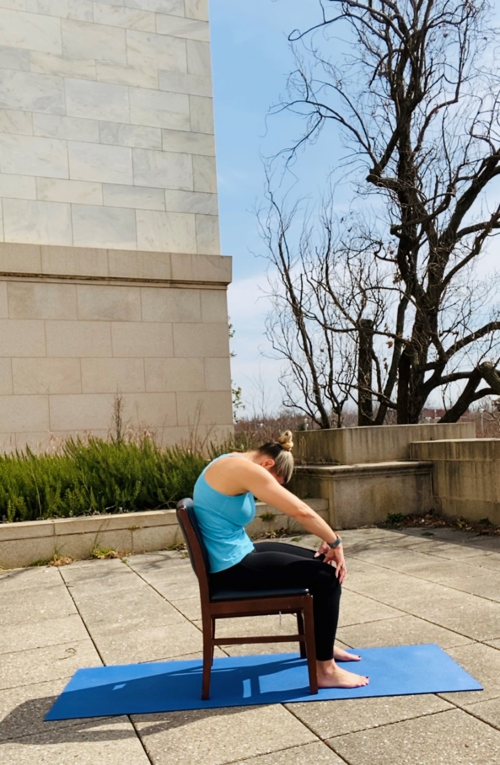
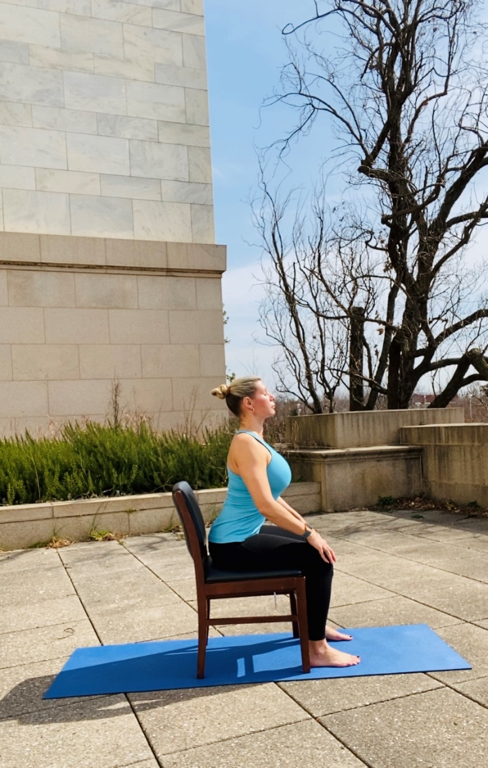
Benefits: Cat pose releases tension throughout the back, shoulders and neck, while Cow releases tension throughout the pectoral muscles and abdomen. These movements also help with digestion as we compress and elongate our stomach and intestines, while providing an internal massage of the organs to help improve their function. Cow also allows the ribs and diaphragm to expand, allowing an increase of oxygen.
2. Seated Spinal Twist: Sitting nice and tall with the legs at a 90-degree angle, inhale raising arms to shoulder height and exhale as you turn from your shoulders (avoid twisting from your low back) to your left. Place your right hand on the outside of your left knee, and extend left arm toward the wall behind you within a range of motion that feels good in that moment. If you feel comfortable, stay here for a few breaths, continuing to breathe as deeply as possible, reaching your left fingers further towards the wall on every exhale. Return to your forward position and repeat on the opposite side.
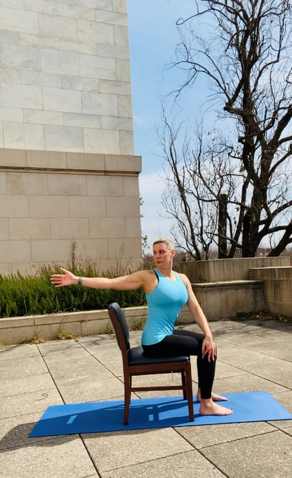
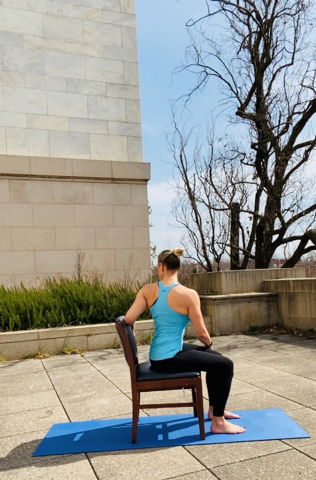
Benefits: This seated twist helps to release tension in the shoulders, low back and lats. The pose also has the potential to alleviate headaches by releasing tension in the shoulders and back that can create additional tension in the trapezius muscles.
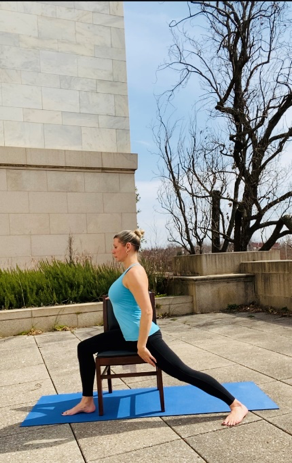
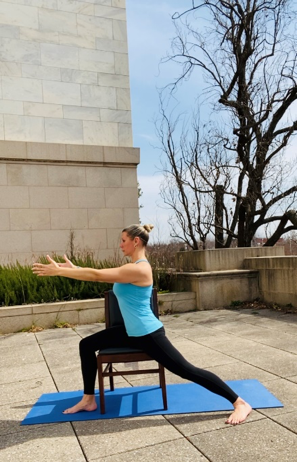
3. Warrior I: Slide yourself to the edge of your chair and turn toward the left, placing your left leg off and over the side of the chair. Extend your back right leg behind you with the foot as flat on the floor as possible and the toes slightly turned toward the right corner of the room. Slowly shift your hips toward your left leg and raise arms out in front at shoulder height or above your head with palms facing one another. Ensure shoulders stay relaxed by imagining you're holding an apple between your shoulder blades. If having your arms raised creates pain, lower them down slightly. If you like to challenge yourself, press the heel of your left foot into the ground activating the left quadricep. Repeat on the opposite side.
 .
.  .
. 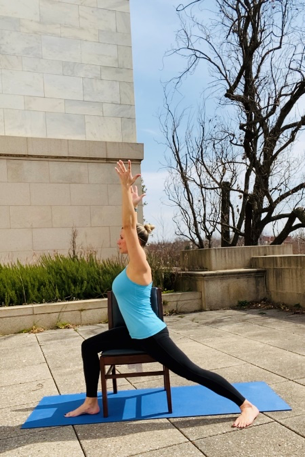
Benefits: This pose will release tension by stretching the hip flexors, calf muscle, ankle, foot and quadriceps. Releasing this tension can help alleviate discomfort in the low back, which is often the result of tight muscles placing strain on the pelvis.
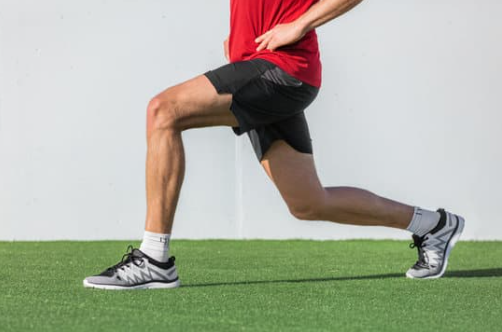
4. Lunge: To get into this pose, you can stay in the Warrior I position and simply turn your back foot so toes face forward and then press back in your raised heel. This gives you very similar benefits as the Warrior I, while targeting the muscles at different angles to allow for a better release of tension throughout the area. If you would like to add a strengthening component to the quadriceps, press the front heel firmly into the ground.
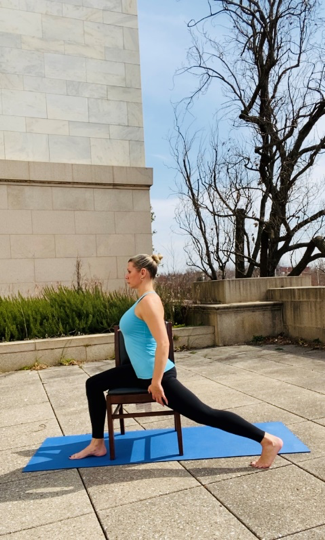
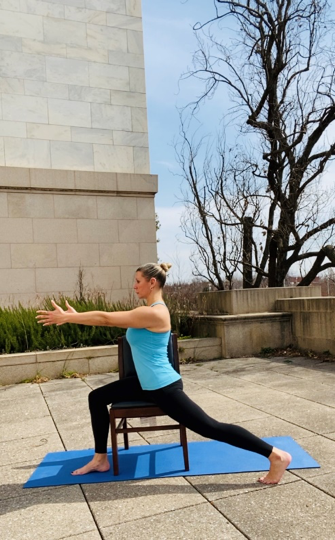
Benefits: The lunge allows for tension to be released in the low back, hip flexors, calf, ankle and foot. The lunge is a nice alternative to the Warrior I for those who lack flexibility in the pelvis or feel uncomfortable in Warrior I.
5. Down Dog: Standing behind the chair, place your hands about shoulder width apart on the back of the chair. Step your legs back until you start to feel a stretch in your hamstrings with heels in contact with the floor. From there, start to drop your head between your arms until you are no longer able to go any farther. Soften shoulders away from your ears, elbows slightly bent and keep breathing. As you start to relax, shift the weight of your body toward the wall behind you until you feel an increased sensation. Pause, take several deep breaths and then slowly bring yourself back to standing.
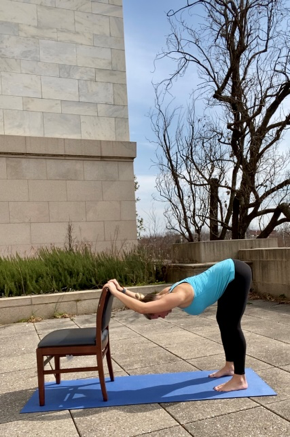
Benefits: Down dog is a great pose to help increase hamstring flexibility, while releasing tension through the shoulders, neck and lats.
6. Thread the Needle: Standing behind the chair, place your hands about shoulder width on the back of the chair. Step your feet back like you were doing a down dog, then take your right arm, thread it under your left arm and place your hand on the outside of the chair. Shift your weight back and you should feel a release on the right side of your torso. Focus on keeping your back flat and your core tight as you pull gently on the right hand. Hold, then repeat on the opposite side.
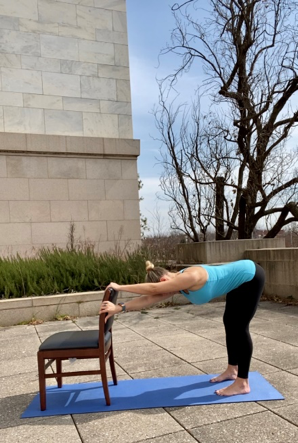
Benefits: This slight spinal twist helps release tension in our shoulders, neck and low back. Doing this pose regularly can help alleviate chronic shoulder and back pain.
7. Forward Fold: Start by standing sideways by the chair with one hand on the back of the chair. Maintain a long spine as you hinge at the hips and start to bring your chest forward. When your hamstrings at the back of your thighs no longer want to stretch, start to round your back, allowing the top of your head to reach toward the floor. Stay in this folded position for a few breaths, then engage your core and press through your heels to come back to stand. If you are experiencing vertigo or other visual or balance issues, as you hinge forward keep a focal point in front of you and decrease range of motion. With consistency in your practice, you will more than likely increase range of motion in time.
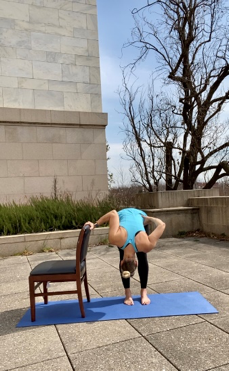
Benefits: A forward fold is considered an inversion, in which the head goes below the hips and heart. Poses such as a forward fold can help increase circulation, energy levels and flexibility in the hamstrings. If you have high blood pressure, consult with a doctor before attempting any inversions.
8. Tree Pose: Standing behind and to the side of your chair, load your weight into your left leg, while coming to the ball of your right foot with your right heel balanced alongside your left ankle. Being mindful of not locking out the stabilizing left leg, contract your belly and lift up slightly with the chest to achieve tree pose. If you would like a challenge, bring the right foot off the ground completely and take it to the outside of your calf or up onto the left inner thigh, being mindful to no place the foot directly on the knee. For an extra challenge, play closing one eye, then the other.
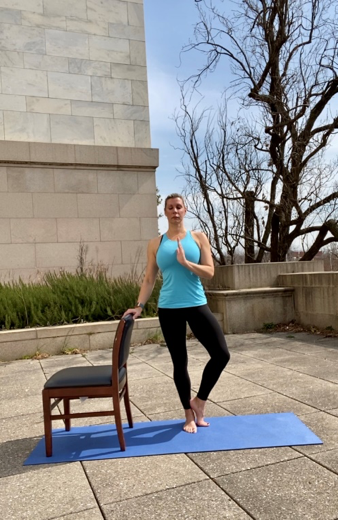
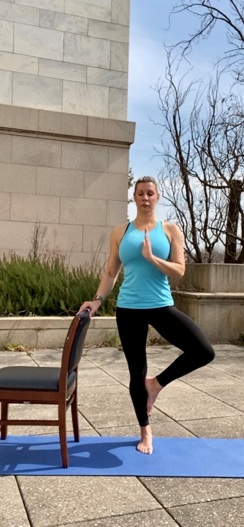
Benefits:A true balance and core stabilization challenge, tree pose also helps with strengthening our stabilizer muscles in our feet and ankles.


